Surveys List
The Surveys section provides an overview of all your surveys, including their status (active/inactive) and the number of submissions for each.
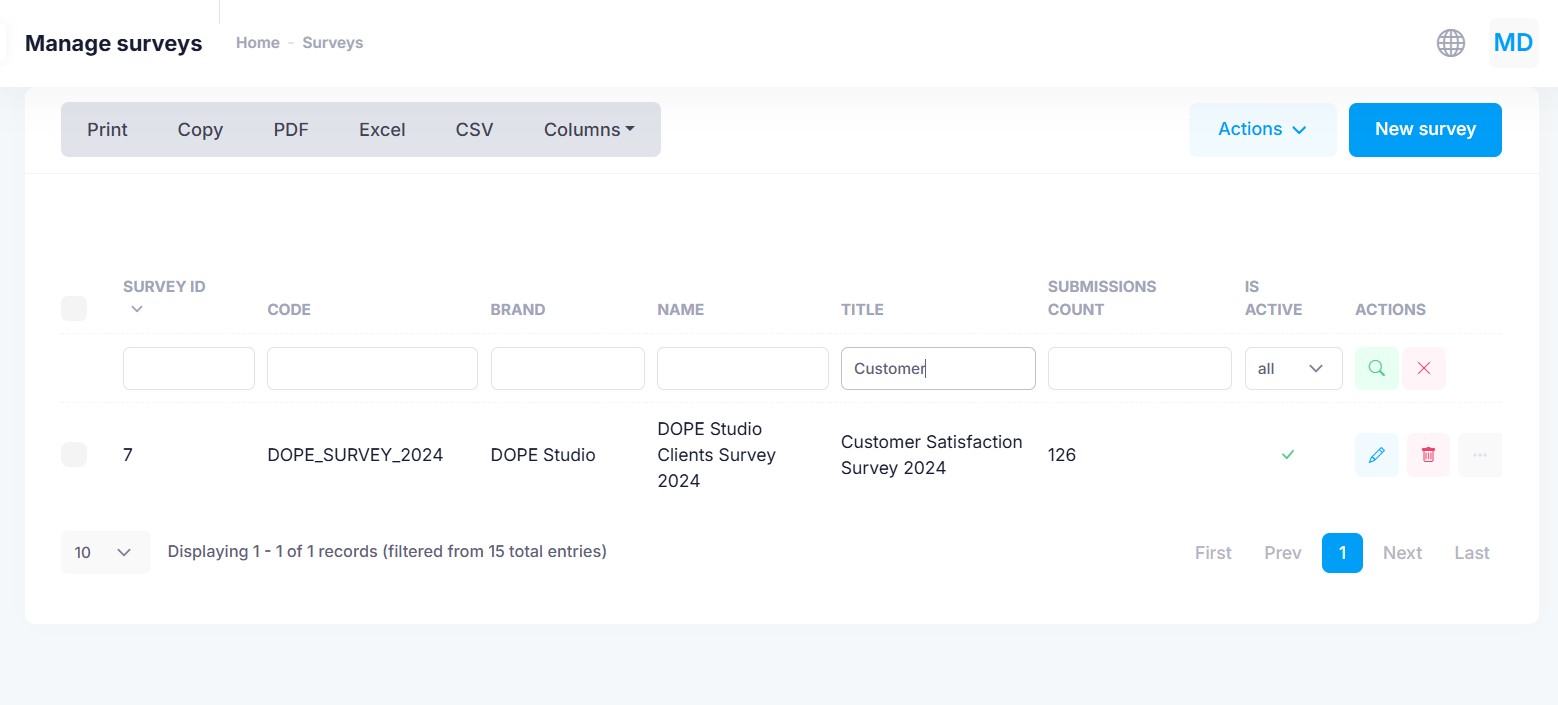
From this list, you can:
- Filter and sort surveys using the table headers
- Edit, delete, or clone a survey
- Click the submission count to view individual responses
Surveys Editor
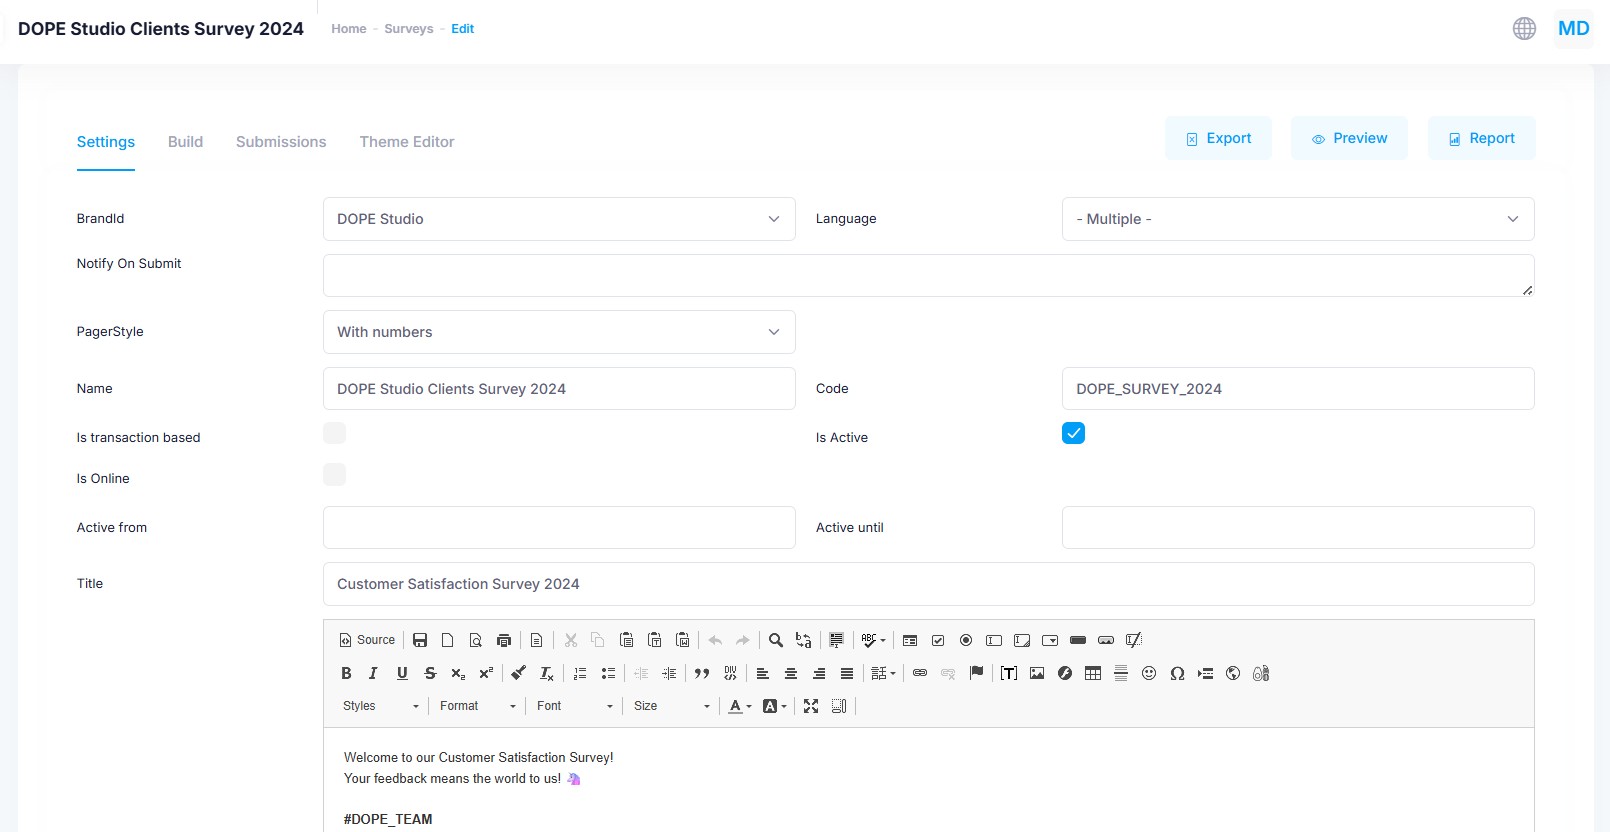
Surveys Settings
When you edit a survey, you'll land on the Survey Settings screen, where you can configure:
General Options
- Brand: Useful for multi-brand environments
- Language: Set multiple if the survey is multilingual
- Notify on Submit: Email addresses that will receive alerts on new submissions
- Pager Style: Choose between:
Previous/Next(step-by-step navigation)Numbered(quick access to any question)
- Name: Internal reference, not shown to respondents
- Code: Unique identifier for programmatic access
- Is Transaction-Based: Enable for post-purchase surveys targeting specific transactions
- Is Active: Allows users to fill out the survey
- Is Online: Specify whether the survey targets online or in-store purchases
- Active From / Until: Define the availability window
- Title: Displayed as the survey's main heading
- Intro: Introductory text shown before the first question
- Start Button Text: CTA text (e.g., “Let’s begin”, “Start answering”)
- Thank You Page: Message shown after completion
- Already Submitted Page: Message shown if a user attempts to take the survey again (for non-anonymous surveys)
Styling Options
- Logo: Shown in the survey header
- Favicon: Shown in the browser tab
- Background Image: Optional survey background
- Photo (960×910): Decorative image for all questions on desktop
- Photo (414×268): Decorative image for the intro screen on mobile
- Show Intro: Toggle whether to include an intro screen
- Display Mode:
Fullscreen: One question per screenSplit Fullscreen: Question on the left, image on the right (desktop only)One-Pager: All questions on a single scrollable page
Theme Selection
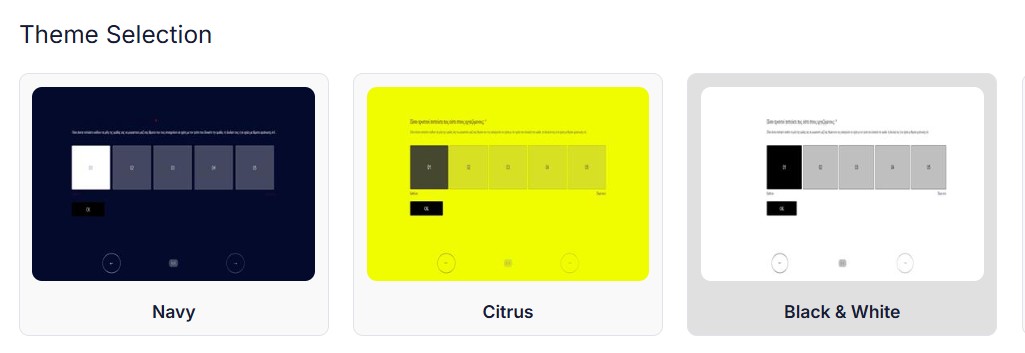
Choose the visual style for your survey by selecting a theme from the thumbnails. Themes control the overall look and feel — including fonts, colors, backgrounds, and more.
➡️ Learn how to customize themes in the Theme Editor.
Build
In the Build tab, you can structure your questionnaire by adding, editing, reordering, or removing questions.
➡️ Explore all question types and layout options in the Survey Builder.
Submissions
In the Submissions tab displays all received responses. Click View next to a submission to see the answers of a specific respondent in detail.
Survey actions
At the top-right corner of the survey editor, you'll find key actions:
Report

Once survey responses begin coming in, click Report to access detailed analytics, including:
- Total Submissions
- Response Distribution for each question
- Average Scores on rating-scale questions
- NPS Score for Net Promoter Score-type questions
- Text Answers from open-ended questions
For individual-level responses, navigate to the Submissions tab, where you can review each participant’s answers in detail.
Preview
Use Preview to see exactly how your survey will appear to respondents — including styling, layout, and logic.
Export
Click Export to download all submissions as an Excel file. Use this export to create pivot tables, generate custom reports, or perform deeper data analysis.
Automate Survey Send-Out
Surveys in Mercury can be distributed either manually or automatically:
- Manual Distribution: Copy and share the survey’s direct link with your recipients.
- Automated Distribution: Use predefined automation flows to send surveys after specific customer events, such as a purchase or a lapse in activity.
To set up automated delivery:
-
Choose a Trigger
Select a relevant trigger in the Automation Setup screen (e.g. Purchase Thank You, Retention - Missed You). -
Assign a Survey
In the campaign or automation settings, select the desired survey from the dropdown menu. -
Insert the Survey Link in the Message
- Known (Personalized):
Use the “Survey Link” from the personalization tag list. This embeds recipient metadata and ties each response to the corresponding customer. - Anonymous:
Preview the survey and copy the public link. This link does not include any personal data and can be shared freely.
- Known (Personalized):