Roles Management
Mercury’s Roles module lets administrators define sets of permissions that can be assigned to users. A role controls which areas of the system a user can access, and what actions they can perform.
Roles List (Grid View)
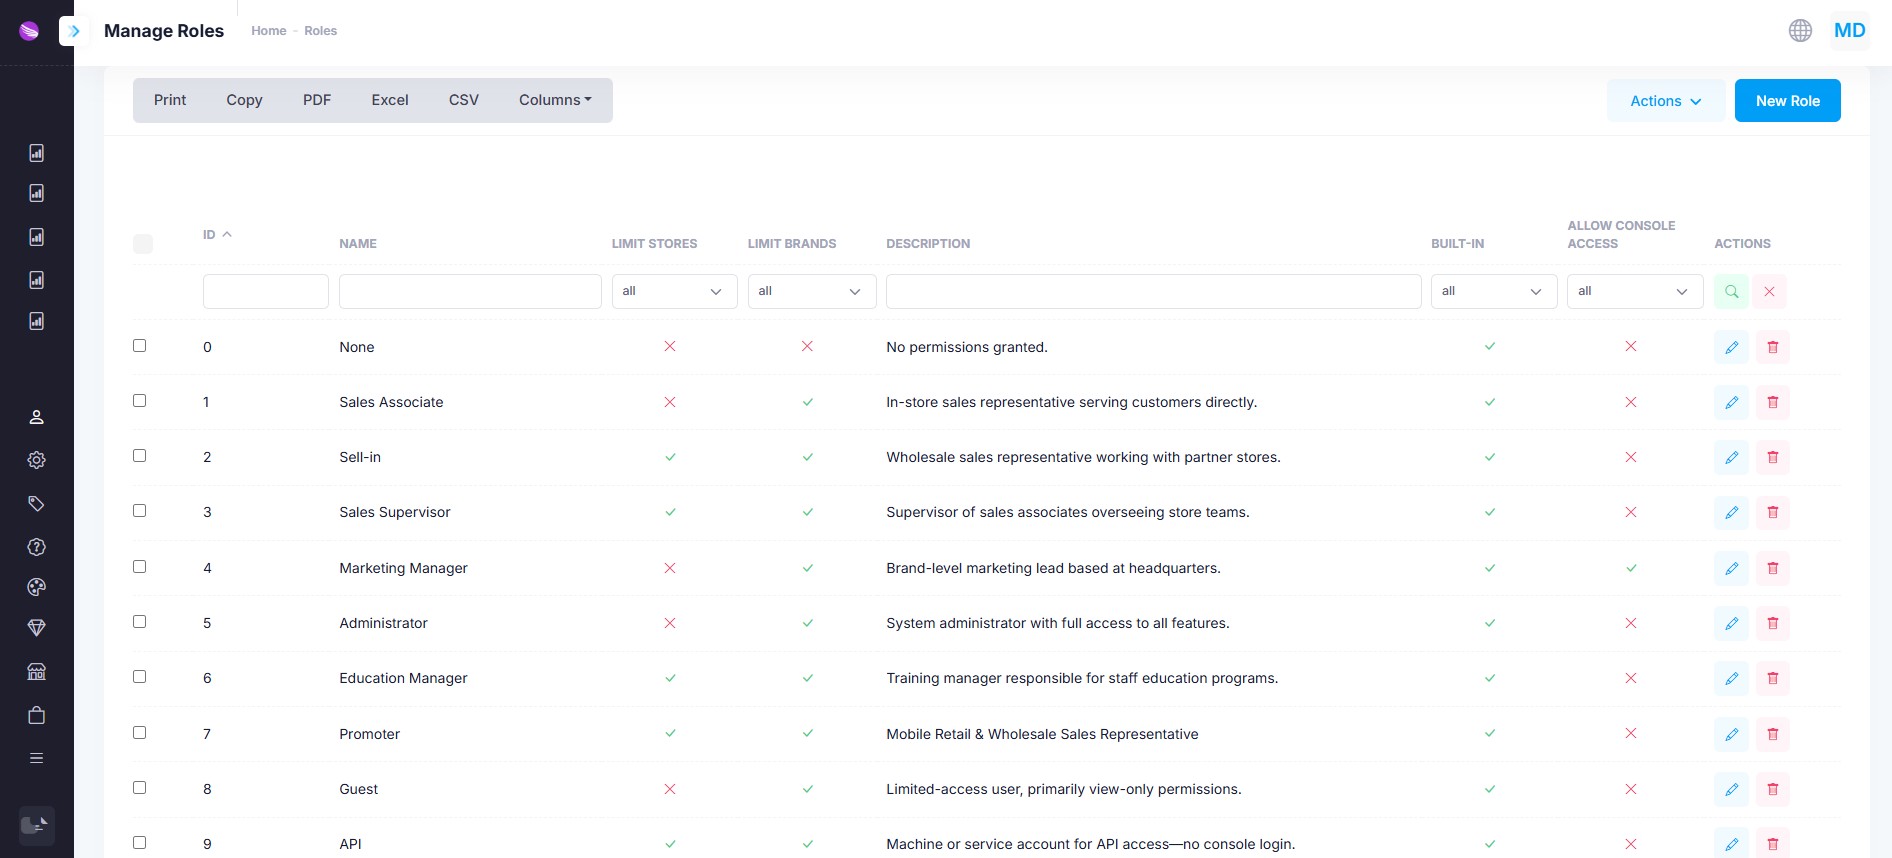
From the Manage Roles screen you can:
- Filter or search by any column
- Export the list as Excel, CSV or PDF
- Bulk Actions: select multiple roles to delete or toggle built-in status
- New Role: click to open the create-role form
- Row Actions: use the Edit or Delete icons to modify or remove a single role
Columns
| Column | Description |
|---|---|
| ID | Internal role identifier |
| Name | Display name of the role |
| Limit Stores | ✓ if the role’s permissions can be scoped to specific stores |
| Limit Brands | ✓ if the role’s permissions can be scoped to specific brands |
| Description | Brief summary of the role’s purpose |
| Built-in | ✓ if this is a system-provided role that cannot be deleted |
| Allow Console Access | ✓ if users in this role may sign in to the admin console |
| Actions | Edit or Delete |
Role Details (Create / Edit Form)
Click New Role or the edit icon on any row to open the role form, which has two tabs:
1. Basic
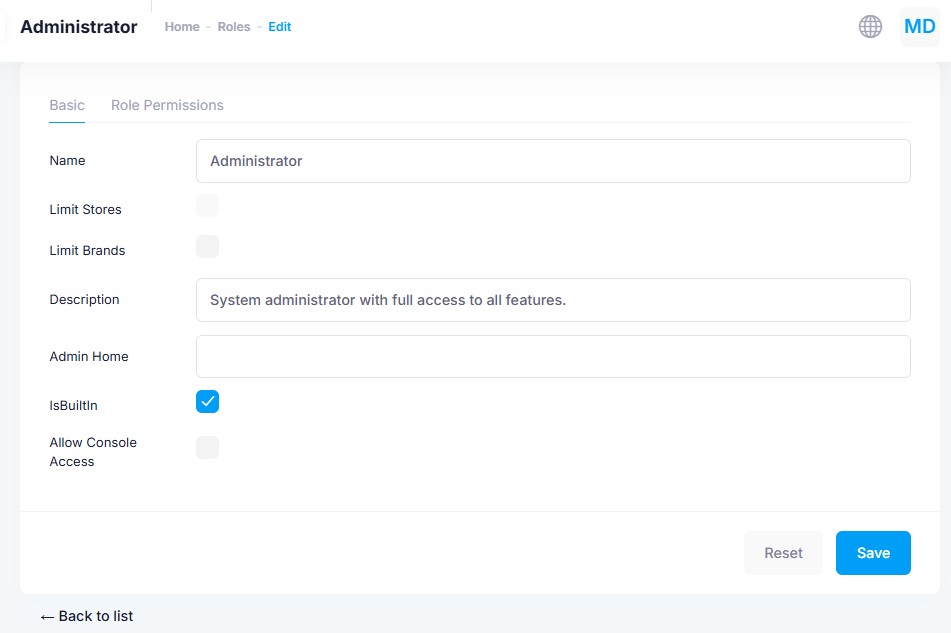
| Field | Description |
|---|---|
| Name | Human-readable name for the role |
| Limit Stores | Checkbox to restrict permissions by store (when enabled, you must assign specific stores) |
| Limit Brands | Checkbox to restrict permissions by brand (when enabled, you must assign specific brands) |
| Description | Short summary of the role’s responsibilities |
| Admin Home | Optional URL or route to land users on when they first sign in to Mercury Admin Console |
| Is Built In | ✓ if this is a default system role (cannot be removed or renamed) |
| Allow Console Access | ✓ to permit users in this role to log into the Mercury admin console |
2. Role Permissions
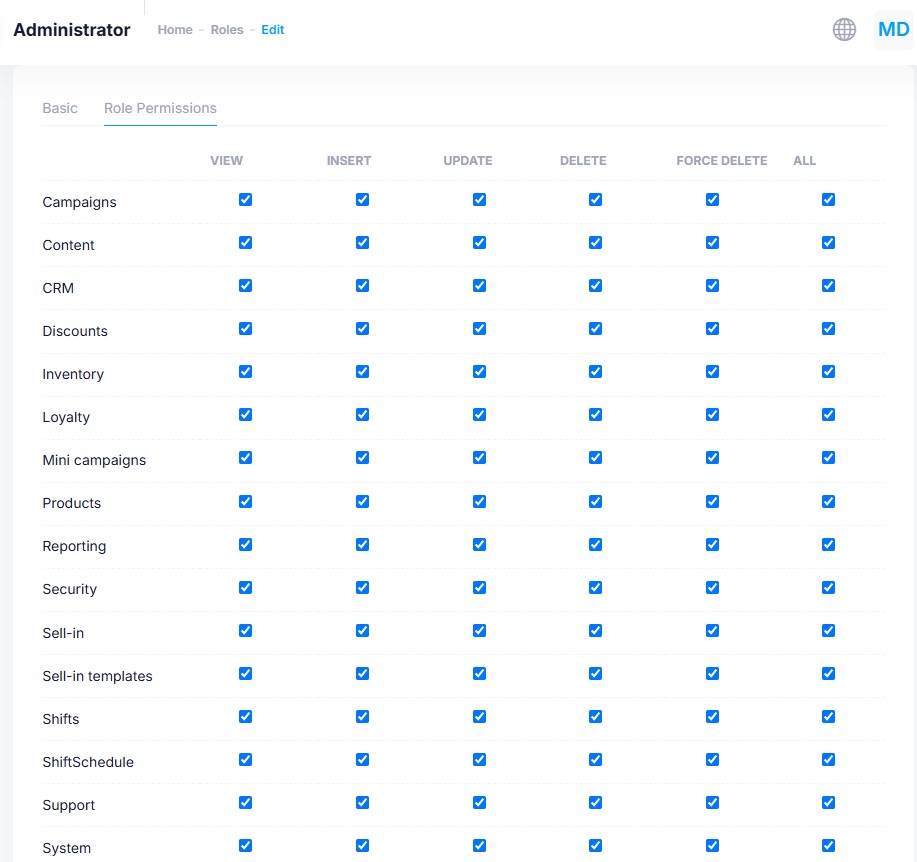
This tab lists every major module or feature area. For each, you can grant or deny the following actions:
| Column | Meaning |
|---|---|
| View | Permission to see records in this module |
| Insert | Permission to create new records |
| Update | Permission to edit existing records |
| Delete | Permission to perform soft-deletes or remove records |
| Force Delete | Permission to permanently delete or purge records |
| All | Shortcut to grant all of the above permissions at once |
Check the boxes for each module (e.g. Campaigns, Content, CRM, Discounts, Inventory, Loyalty, Products, Reporting, Security, Shifts, Support, System, etc.) to configure exactly what users in this role may do.
💡 Best Practice:
- Create narrowly scoped roles for day-to-day users (e.g. “Content Editor” with View/Insert/Update on Content only).
- Reserve broad roles (e.g. “Administrator”) for trusted staff and limit their assignment.
- If you enable Limit Stores or Limit Brands, remember to assign the specific stores or brands under the user’s profile.
- Use the Admin Home field to direct each role to the most relevant dashboard upon login.